Published
- 5 min read
Smartphone Birding: How to Take Amazing Oriole Photos with Your Phone
Smartphone Birding: How to Take Amazing Oriole Photos with Your Phone
You finally have a magnificent Baltimore Oriole perched perfectly on your new cedar feeder. The lighting is golden, the bird is eating happily, and you want to capture the moment. You pull out your smartphone, tap the screen to zoom in 10x, and snap a picture.
You look at the result, and it’s a disaster. It’s a pixelated, blurry orange smear.
The reality of modern smartphone cameras is that while they are incredible for wide-angle landscapes and portraits, they fall apart when you need extreme “reach.” Digital zoom simply crops and enlarges the pixels, destroying the image quality. However, you do not need to spend $1,500 on a dedicated “superzoom” camera to get a great shot.
In this guide, I will share the professional “Smartphone Birding” techniques—including the secret of “Digiscoping”—that will allow you to capture stunning, crystal-clear photos of Orioles using the phone already in your pocket.
1. The Pro Technique: “Digiscoping” (The Telescope Hack)
If you cannot bring the camera to the bird, you must bring the bird to the camera using optics. This technique is called Digiscoping.
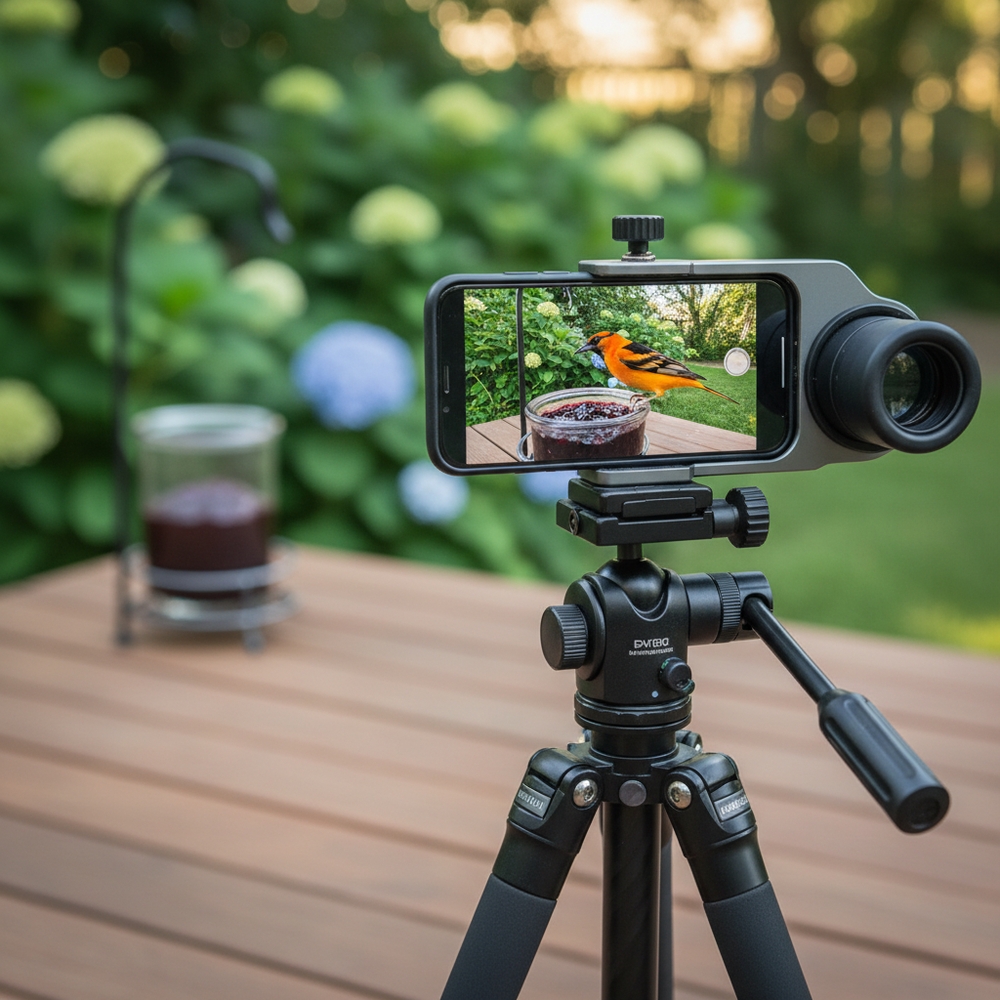
- How it works: You physically attach your smartphone’s camera lens to the eyepiece of a spotting scope or a pair of high-quality binoculars. The binoculars act as a massive optical zoom lens for your phone, allowing you to take crisp photos of a bird 50 feet away without using any digital zoom.
- The Problem: Trying to hold a phone perfectly still against the eyepiece of a pair of binoculars by hand is nearly impossible. The image will be shaky and misaligned.
- The Solution: You need a Smartphone Digiscoping Adapter. This inexpensive bracket clamps onto your binoculars and securely holds your phone in perfect alignment with the optical lens.
- Affiliate Pick: Gosky Universal Cell Phone Adapter Mount (For Binoculars/Monoculars)
2. The Setup: How to Execute the Perfect Digiscope Shot
Once you have your adapter, follow this workflow for a flawless photo.
- Mount the Binoculars: You cannot hand-hold this setup. The combined weight of the phone and the binoculars will cause “micro-shakes.” You must mount your binoculars to a sturdy tripod using a binocular tripod adapter.
- Affiliate Pick: Metal Binocular Tripod Adapter Bracket
- Focus the Optics First: Do not attach the phone yet. Look through the binoculars and manually turn the focus wheel until the Oriole feeder is crystal clear.
- Attach the Phone: Clamp your phone into the adapter, align the phone’s primary lens with the binocular eyepiece, and tighten it down.
- Use the Timer: Do not tap the screen to take the photo; tapping causes the phone to vibrate. Set your camera app’s timer to 3 seconds. Tap the button, step back, and let the camera take a perfectly still photo.
3. The “Remote Blind” Technique
If you don’t want to mess with binoculars and tripods, you can use the “Remote Blind” strategy to get your phone inches away from the bird.
Orioles are terrified of humans, but they ignore inanimate objects.
- The Strategy: Buy an inexpensive, flexible tripod (like a GorillaPod). Wrap the tripod legs around the pole or branch directly next to your Oriole feeder.
- The Tech: Attach your smartphone to the tripod, framing the feeder perfectly.
- The Execution: Go back inside the house. Use a Bluetooth Camera Shutter Remote (which pairs instantly with your phone) to trigger the camera from your kitchen window while you drink your coffee. The Oriole will fly right up to the lens, and you will get a stunning, high-resolution, wide-angle shot of the bird in action.
- Affiliate Pick: Flexible Tripod with Wireless Bluetooth Remote
4. Software Hacks: Locking Focus and Exposure
When your phone is set up near the feeder, the automatic settings can ruin the shot if the lighting changes.
- AE/AF Lock: Before you walk away from the camera, tap and hold on the screen exactly where the bird will sit (e.g., the edge of the jelly cup). A yellow box will appear saying “AE/AF Lock” (Auto-Exposure/Auto-Focus Lock). This forces the camera to lock its focus on that exact plane. When the bird lands, it will be perfectly sharp, and the background will naturally blur.
Conclusion
You don’t need a heavy, expensive DSLR camera to become a successful wildlife photographer. By utilizing the optical power of your binoculars through Digiscoping, or by employing the “Remote Blind” trick with a cheap Bluetooth clicker from Amazon, you can capture breathtaking, magazine-quality photos of your Orioles using the smartphone you already own. Set up your gear, be patient, and get ready for the perfect shot!